
Now that I’ve practiced using sounds to tell a story, it’s time to add in the visuals. I am working on a video montage, showcasing the energy and businesses at Long Wharf in New Haven, Connecticut. It will build on the knowledge I have about audio using a voice over and music with the addition of a variety of camera shots that bring the outdoor space to life in a video.
Reading & Writing
Chapter 1 in “The Bare Bones Camera Course for Film and Video” explains all the basics of using a camera. Tom Schroeppel writes how a camera works and how lenses are used to recreate what we see with our own eyes. Lenses on a camera collect light. Then chemicals react to the amount of light and form a pattern that makes up a picture. Those pictures can be shown individually as an image or strung together to look like a continuous movement in a video. Schroeppel explains the different settings on a camera and what impacts the way a picture looks. Exposure and color temperature change depending on the amount of light a lens is observing.
In chapter 2, Schroeppel discusses composition. Composition is the way of arranging what a viewer sees, because they only see what the photographer decides. He first explains the importance of a tripod, then goes into types of composition that professionals use. They use the rule of thirds to place a subject at an ideal spot in the frame. Balance is used by giving a subject appropriate head room and making sure the frame is equal using different elements with a variety of sizes. Colors can be used to draw attention to something specific. Schroeppel says the brightest area in a picture is what the viewers will focus on. Angles are important too and are measured by height and width. Typically, the camera should be in line with a subject. It can also be used to give clues to the viewer, as a higher angle makes a subject look more important, while a lower angle makes them look inferior. The subject may be the spotlight, but the background is crucial. It should not be distracting but should fit with the story the picture is telling. To achieve good composition, a photographer should take the time to find the best framing, background, balance, and color.
Chapter 5 is all about moving the camera. There are different ways a camera can move and each has a different name. A zoom-in moves from a wide shot to a close-up shot. It brings the audience’s attention to what is being zoomed in on. A zoom-out is a close-up shot to a wide shot that reveals new information and gives context into where a scene is taking place. Pans are horizontal moves and tilts are vertical moves. They both give new information about a scene. Mastering camera movements can be hard, so Schroeppel gives some tips. He says to start and end every shot with a static, or still, shot. This limits distraction and can help you when editing. He also says to move from an uncomfortable position to a comfortable one. This applies when a photographer is shooting a pan. They should not twist at the end of the shot, they should twist to get to the beginning position and end comfortably.
Schroeppel talks more about the art of a montage in chapter 6. He says a montage is a string of shots used to consolidate time or distance, set a tone, or summarize information. A successful montage has unique individual shots that don’t all look the same. The framing should be different, which can easily be done by tilting the camera a different way in each take when filming.

Jimm Fox wrote an article called “Video Pre-Production Planning Check-List – 11 Steps to a Successful Project.” In it, he gives a list of what someone needs to do to achieve their goals when working on a visual project. He says the pre-production planning phase is the most important and can set the tone for the whole project. First a creator needs to define their business objective, or decide what they want to accomplish. Then they need to research and identify their audience. These should be people who will watch and benefit from the video. Budgeting the project comes next, then the creator must think of the ideas or topics they want to communicate. Making a creative brief can help communicate these key points and brainstorm ideas. Developing a concept, or generating the big idea, allows the creator to pick their team and a process that works best for them. A treatment is an outline of the creative approach. It is generally a document summarizing the main idea with the style and actions planned out. Storyboarding a step-by-step layout of the video is the first way to visualize the whole project. It includes the narration, which explains who is on screen and what they say. It also lays out what is being shown and the actions being taken. Finally, it details the presence of supporting elements like text, animations, music, and sound effects. The next step is planning the distribution. This matters because audiences on different platforms want to see different things. Social media viewers want a short video while others could want a documentary. If the video is part of a larger production company, you need to know who has final say and approves the idea and then the final project.

In the article “Learn What is a Storyboard and How to Use it to Make Better Videos” on the Creately website, the author lays out what a storyboard is and why it is so important to the pre-production process of making a video. A storyboard looks like a comic strip and shows each frame of a project with the elements that will be on the screen. It can help plan a project by deciding on the purpose, key message, length, and where it will be shared. Storyboards also help a production team visualize their script, even if the drawings are just stick figures. The author says storyboards are beneficial because they effectively map the content out, work as a communication tool for everyone to see what is happening, and help structure the video. This will help save time and money during production because you know what resources you need. Common mistakes on a storyboard, like lack of clarity, overcomplicated and inconsistent shots, and forgetting the audiences’ point of view, can set the project back during production.
Research to Inform
To learn more about visual composition, I found examples from some of my favorite shows and movies. These give a firsthand look at different shots and how they are used to tell a story.
Clueless: Drivers Test Scene
This scene from the movie “Clueless” shows a failed driver’s test. Although the main character, Cher, does not pass her exam, the production crew succeeded in using principles of visual composition. The rule of thirds is used throughout the scene on the individual shots of the characters. They are both lined up in the third lines on the screen, and also have a balance of headroom that makes sense with the rest of the scene. In addition, they are in a bright white car, which draws the audience’s attention because it is the most vibrant thing in the camera’s view. The background is not distracting, as it simply shows roads and greenery. This allows the viewer to focus on the characters and their conversation.
Grease: Summer Nights Scene
The scene in “Grease” where the characters perform “Summer Nights” also shows good visual composition. First, the main female character Sandy wears a distinct yellow, which draws the viewer to look at her. She stands out from the rest of the characters, making it clear that she is the focus. The rule of thirds is also used a few times, including at 1:24 when Sandy stands on the table for a tight shot. This is just one of the creative shot varieties used in the scene. Additionally, depth is shown when the male lead Danny lays down around 1:26. You can see action happening behind him and in front of him, giving perspective on where he is in relation to other characters in the shot. There is extra room in the shot at 3:15 as Sandy walks, giving her space to move, which is an example of lead room.
Prince Diaries 2: Coronation Scene
This scene from “The Princess Diaries 2: Royal Engagement” shows the coronation of Mia, as she becomes queen. One of the visual compositions used very well multiple times is leading lines. There is a path of soldiers leading to the subject at 22 seconds and 2:38, showing where the audience should be looking. Mia is also wearing a white dress, which draws the viewer’s attention. Balance is used around 1:06 when Mia and her grandmother are walking simultaneously down the grand staircases. They are both in the same spot, symmetrical to each other, making the shot look very even. The scene also includes examples of the rule of thirds and uses a pan at 2:21 to reveal the presence of a character.
Create
Photo Scavenger Hunt
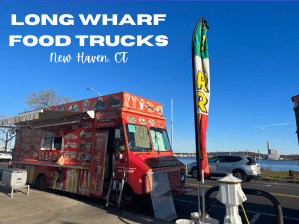
To prepare for my montage, I practiced using a variety of camera shots that I learned about in this weeks readings and materials. I took these pictures on my iPhone 14 Pro at the location where I plan to do my montage, the Long Wharf food truck park in New Haven.
I chose to do my montage at Long Wharf because there is so much action. People are everywhere, walking and eating. The food trucks are colorful and active. It’s just a fun place to go, especially for someone who never knew it existed.
The process of getting these photos was more complicated than I expected. The location I chose was buzzing with people and since there was a lot of movement, it was difficult sometimes to get everything into a still image. The easiest guideline was definitely the rule of thirds. In my journalism experience, I always use this camera angle when doing interviews. The shadow depth of field caused some trouble because I was using an iPhone camera. I had to use portrait mode to blur the background, which took a few tries.
Montage Planning Document
After scoping out Long Wharf and taking pictures, I planned the entire montage. This document contains my ideas for things like the tagline and audio. It also has a draft of the voice over script and storyboards of all the shots that you will see in the finished montage. Although I know the shots will look different in real life, it’s helpful to map them out and will help me remember my vision when I go to film.
One thing I mentioned in the document is one challenge I may face when filming. If the food trucks do not want to be filmed, I will need to find another location or avoid certain areas of the park. When I was taking pictures, the truck owners were excited to have some publicity, so I do not think this will be a problem.
Now it’s time to get to work on the filming and editing the final montage!

Leave a comment